Apple MacBook or Mac Air is an expensive affair if you go for the high-end configuration. A lot of users go for low storage and low Memory configuration to afford a Mac. But when you run out of storage space, you use external storage devices to store your files. This article on how to use Hard Drive on Mac has the best tips and tricks to connect a USB drive on Mac.
How to Use External Hard Drive on Mac
To use an external hard drive on a Mac, you can follow these steps on how to access Hard Drive on Mac.
Step 1. Connect the external hard drive to your Mac using a USB cable or Thunderbolt cable.
Step 2. Your Mac should automatically recognize the external hard drive and mount it on your desktop.

Step 3. Open Finder and click on the external hard drive icon on your desktop to access the files.
Step 4. You can then drag and drop files to and from the external hard drive, or create new folders and files directly on the external hard drive.
Step 5. To safely eject the external hard drive, click on the eject button next to the external hard drive icon in Finder, or drag the icon to the trash can. Once the icon disappears from the desktop, you can safely disconnect the external hard drive from your Mac.
It is important to always eject the external hard drive before disconnecting it from your Mac to prevent data corruption or loss.
How to Connect USB Drive to Mac
To connect a USB drive to a Mac that has a USB port, you can follow these steps.
Step 1. Insert the USB drive into an available USB port on your Mac.
Step 2. Wait a few seconds for your Mac to recognize the USB drive.
Step 3. If your Mac does not automatically open the USB drive, open Finder.
Step 4. Look for the USB drive under the Devices section on the left-hand side of the Finder window.
Step 5. Click on the USB drive to open it and access the files.
Step 6. To safely eject the USB drive, drag the USB drive icon to the trash can or click on the eject button next to the USB drive icon in Finder.
Step 7. Wait for the icon to disappear from the desktop before disconnecting the USB drive from your Mac.
If the USB drive is not recognized by your Mac, try a different USB port or try connecting the USB drive to a different computer to check if the problem is with the USB drive itself.
Connect Thunderbolt to Mac
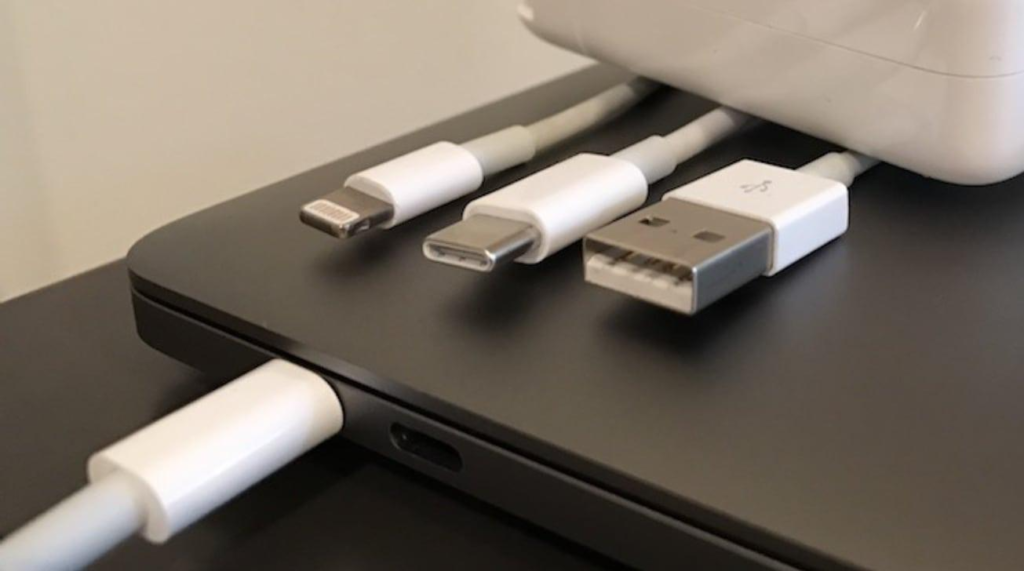
If your Mac doesn’t have a USB port, you will need a Thunderbolt to connect external devices to a Mac.
Step 1. Locate the Thunderbolt port on your Mac. Depending on the model of your Mac, the Thunderbolt port may be labeled with a Thunderbolt symbol or a lightning bolt symbol.
Step 2. Connect the Thunderbolt cable to the Thunderbolt port on your Mac.
Step 3. Connect the other end of the Thunderbolt cable to the Thunderbolt device you want to use.
Step 4. Turn on the Thunderbolt device and wait for it to be recognized by your Mac.

Step 5. If your Mac does not automatically open the Thunderbolt device, open Finder.
Step 6. Look for the Thunderbolt device under the Devices section on the left-hand side of the Finder window.
Step 7. Click on the Thunderbolt device to open it and access the files or use the device as intended.
Step 8. To safely eject the Thunderbolt device, drag the device icon to the trash can or click on the eject button next to the device icon in Finder. Wait for the icon to disappear from the desktop before disconnecting the Thunderbolt device from your Mac.
It is important to note that not all Thunderbolt devices are compatible with all models of Macs, so it is important to check the specifications of your Mac and the Thunderbolt device before attempting to connect them.
Format Hard Drive on Mac
If your external hard drive is already cluttered, you can format the hard drive on a Mac before you connect and learn how to use Hard Drive on Mac.
Step 1. Open Finder and click on the Applications folder.
Step 2. Navigate to the Utilities folder and open Disk Utility.
Step 3. Select the hard drive you want to format from the list of drives on the left-hand side of the Disk Utility window.
Step 4. Click on the Erase button at the top of the Disk Utility window.

Step 5. In the Erase window, select the file system format you want to use, such as APFS or Mac OS Extended.
Step 6. Give the hard drive a name in the Name field.
Step 7. If desired, choose a security option to securely erase the hard drive data.
Step 8. Click on the Erase button to begin formatting the hard drive.
Step 9. Once the formatting process is complete, the hard drive will be available for use.
It is important to note that formatting a hard drive will erase all data on the drive, so be sure to back up any important files before formatting. Additionally, it is important to choose the correct file system format for your needs, as some formats may not be compatible with certain operating systems or devices.
Recover Data from External Hard Drive on Mac
If you have accidentally formatted or lost data on your external hard drive, you may need to recover the lost data on your Mac. You can try various ways to recover data from an external drive on Mac.
Step 1. Connect the external hard drive to your Mac and ensure that it is properly mounted.
Step 2. Open the Applications folder and navigate to the Utilities folder.
Step 3. Open the Disk Utility application.

Step 4. In the Disk Utility window, select the external hard drive from the list of drives on the left-hand side.
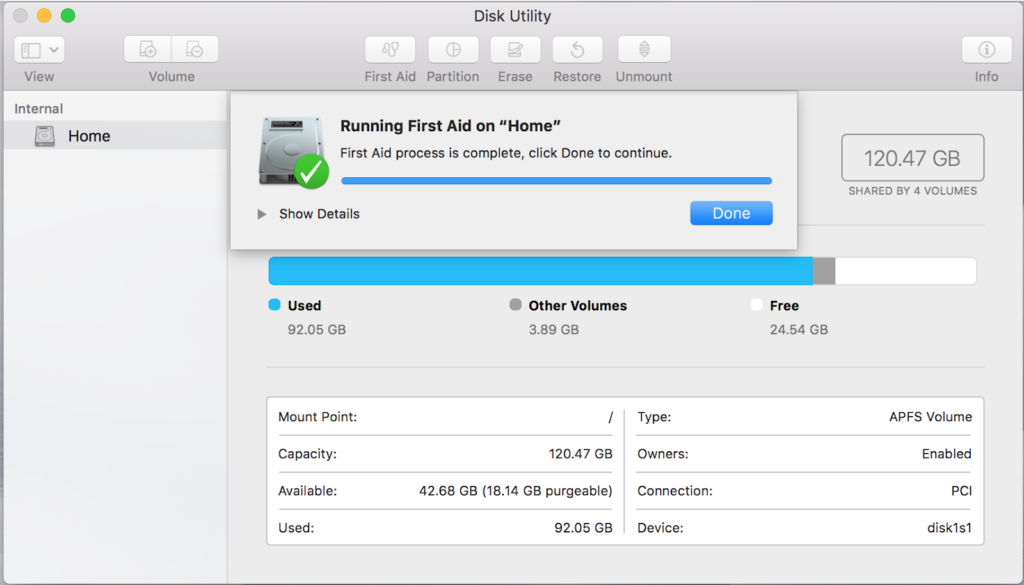
Step 5. Click on the First Aid button and let the utility scan the external hard drive for any errors.
Step 6. If the utility finds errors, follow the prompts to repair the drive.

Step 7. Once the drive is repaired, close the Disk Utility application and open Finder.
Step 8. Navigate to the external hard drive and check if your files are accessible.
If your files are still not accessible, you may need to use a data recovery tool such as EaseUS Data Recovery Wizard or Disk Drill to recover the lost data. It is also recommended to back up your data regularly to prevent data loss.
Final Words
This article on how to use a hard drive on Mac has all the basic steps to connect a hard drive to your Mac. You may need a Thunderbolt connector to connect external drives or other USB devices including an Ethernet cable. You can format a hard drive if it is already cluttered up. If you accidentally deleted files on your hard drive, you can recover data from an external hard drive on Mac.


